
Library Automation System Instructions
Merge Mitinet-Enhanced Records into Alexandria Version 6
Use these instructions for updating your existing database with the enhanced and merged database from Mitinet. This process only applies when you’ve opted to Merge records. If you haven’t chosen to merge records as part of your data services, please follow the instructions in Update Existing Records.
Please Note: This process is detailed. We recommend printing this document before beginning the procedure. We also recommend performing this procedure during low usage times, as it can take a while to complete, depending on the size of your database.
Part 1: Disable the Preserve Existing Call Numbers Feature
Call numbers are standardized as part of the enhancement process. By default, Alexandria doesn’t allow call numbers to be changed during an import. To get around this, you need to temporarily disable this feature before importing your records.
- Open Alexandria to the Circulation window.
- Click on Edit and choose Preferences.
- Select Items and then the Cataloging tab.
- Uncheck Preserve Existing Call Numbers.
- Save and then select Show All to return to the main Preferences window.
Part 2: Create a New Item Policy to Identify Duplicate Records
Create the policy to identify duplicate records when running reports and to help with removing them.
- Click on Policies.
- Click on Add under Item Policy.
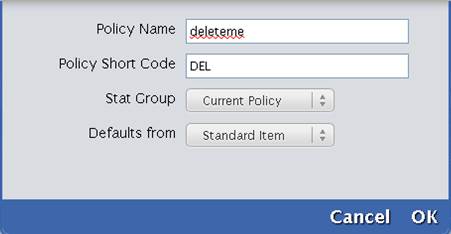
- Enter the Policy Name: deleteme.
- Enter the Policy Short Code: DEL.
- Set the Stat Group: Current Policy.
- Defaults from: Standard Item.
- Click on OK and then Save.
Part 3: Update the Policy of Items and Titles to Remove from the Database
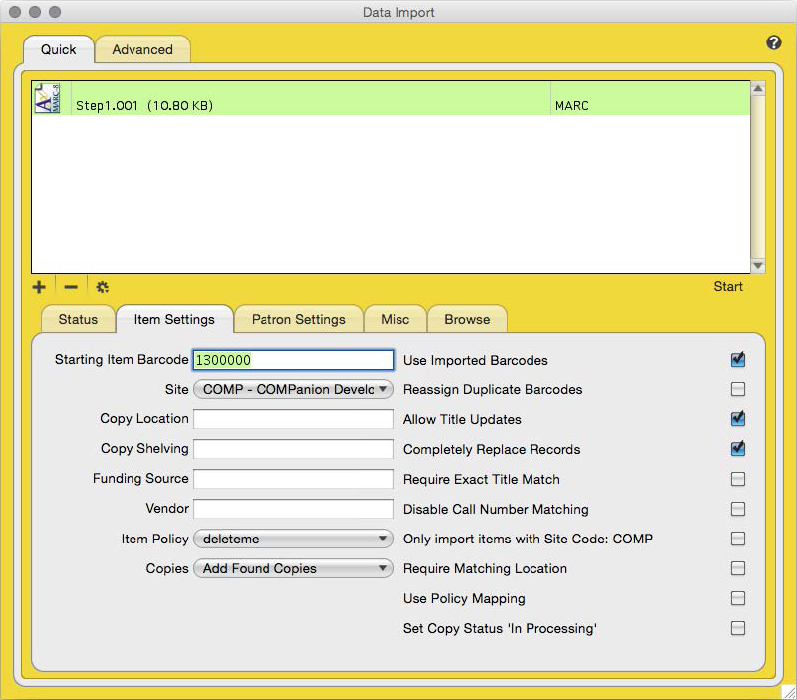
The Step1.001 MARC record file contains records with a modified Copy Policy to identify them.
- Click on Tools and then Import.
- Verify Archive First is checked.
- Select the following items in Item Settings:
- Set Item Policy: deleteme
- Set Copies: Add Found Copies
- Check Use Imported Barcodes
- Check Allow Title Updates
- Check Completely Replace Records
- Click on the + button.
- Navigate to and select Step1.001.
- Click on Start to import the records.
- The Operation Management window shows the status of the import. Note that the updated records are listed in the Operation Summary report.
Part 4: Create and Print a Report Showing Duplicates That are Currently Checked Out
- Click on Tools and choose Reports.
- Expand Circulation within the Categories list.
- Choose General.
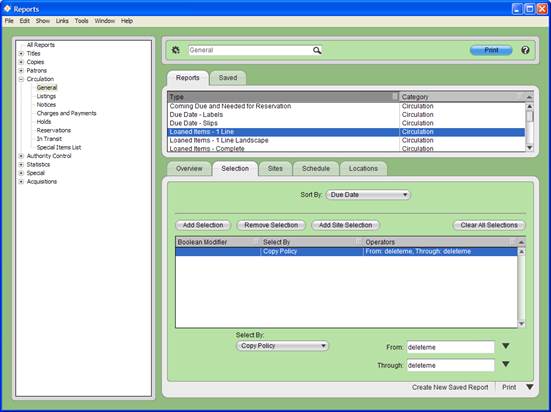
- Select the Loaned Items – 1 Line report.
- Click on the Clear All Selections button.
- Select by: Copy Policy From: deleteme Through: deleteme.
- Check Allow Title Updates.
- Set the option to Sort by: Due Date.
- Click Run.
- The Operation Management window shows the status of the report.
- Open the PDF file and Print it.
Part 5: Delete Duplicate Copies and Titles
- Click on Tools and choose Utilities.
- Click on Copies in the Categories list.
- Select the Remove Copy utility.
- Click on the Clear All Selections button.
- Select by: Copy Policy From: deleteme Through: deleteme.
- Check the option to Remove titles without copies and Checked Out Copies: Delete.
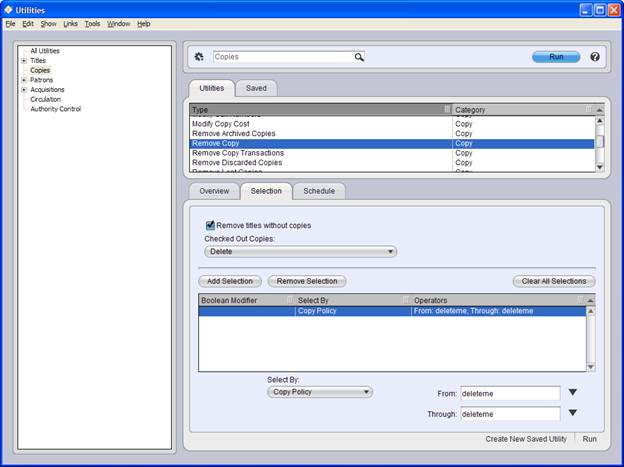
- Click Run.
- The message “This utility will permanently remove copies and/or items. Are you sure you want to continue?” will appear. Choose Yes.
- The message “It is recommended that you run an archive before this utility. Do you wish to do so?” will appear. Choose No.
- The Operation Management window shows the status. Review the Operation Summary report to verify that items were removed.
Part 6: Merge Titles and Update All Records with MARC Enhancements
The Step2.001 and Step3.001 files contain merged records and all other requested MARC enhancements.
- Click on Tools and choose Import.
- Verify Archive First is checked.
- Select the following in the Item Settings menu:
- Set Item Policy: Standard Item
- Set copies: Add Found Copies
- Check Use Imported Barcodes
- Check Allow Title Updates
- Check Completely Replace Records
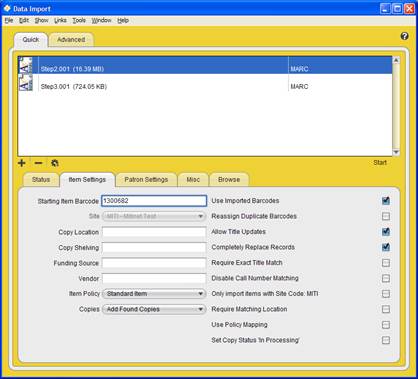
- Click on the ‘+’ button.
- Navigate to and select Step2.001 AND Step3.001.
- Click on Start to import the records.
- The Operation Management window shows the status of the import. Review the Operation Summary report to verify updated records.
Part 7: Restore Affected Circulation Records
This step will restore items affected during Part 5 by checking those items back out. Use the listed data as it appears on the Loaned Items Report to complete this step.
- Verify that you are in Check Out (.) mode.
- Type a period followed by the Due Date and press Enter. For example: .05/20/2024.
- Type the Patron Barcode and Enter.
- Type the Copy Barcode and Enter.
- Repeat steps 1 through 4 until all items have been checked back out to the patrons who originally had them.
The process to update the database with the merged and enhanced records from Mitinet is complete. Remember to restore the Preserve Existing Call Numbers preference back to its original state and examine a sample of records from your database to ensure that everything appears as expected.